Mesh Count Chart: 110 vs 156 vs 230 — What Actually Changes in Your Print
A printable screen printing mesh count chart (TPI + metric T), the 3-screen starter kit, the 4-5x LPI rule for halftones, and the TPI-vs-T confusion nobody explains.
If you only remember one thing from this guide: start with 156 mesh. It handles most everyday one- and two-color jobs. You only step down to 110 when you need a thick white underbase on dark shirts, and up to 230 when the art has fine lines, halftones, or you’re running water-based ink.
The principle behind everything below fits in one sentence: lower mesh count = thicker ink deposit; higher mesh count = finer detail and softer hand feel. Every chart, every rule of thumb, every forum argument is just that trade-off applied to a specific job.
The 60-Second Answer
| Mesh (TPI / T) | Ink deposit | Detail | Typical jobs |
|---|---|---|---|
| 24–60 / 10T–24T | Very heavy | None | Glitter, shimmer, high-density |
| 60–86 / 24T–34T | Heavy | Bold only | Puff ink, athletic numbers, foil adhesive |
| 110 / 43T | Thick | Bold text, spot color | White underbase on darks, block designs |
| 156 / 62T | Medium | Medium | The everyday default — most tees |
| 230 / 90T | Thin | Fine lines, small text | Halftones, water-based ink, soft-hand prints |
| 305 / 120T | Very thin | Very fine | CMYK process, simulated process |
This chart is a starting point, not a law. Ink brand, thread diameter, stencil thickness, and your squeegee setup all move the result. But if you’re standing in front of a shelf of screens wondering which one to grab, this table gets you 90% of the way there.
The Full Mesh Count Chart (Print-and-Tape Version)
The table above is the quick answer. This is the one to print — it adds the metric T numbers, halftone limits, and squeegee pairing in one place, so nobody in the shop has to dig through three different spec sheets mid-job:
| Mesh (TPI) | Metric (T) | Ink deposit | Detail it holds | Best for | Halftone LPI | Squeegee |
|---|---|---|---|---|---|---|
| 24–60 | 10T–24T | Very heavy | None | Glitter, shimmer, high-density | — | 60 soft |
| 60–86 | 24T–34T | Heavy | Bold only | Puff ink, athletic numbers, foil adhesive | — | 60–65 |
| 110 | 43T | Thick | Bold text, spot color | White underbase on darks, block designs | up to 22.5 | 60–65 |
| 156 | 62T | Medium | Medium | The everyday default — most tees | up to 31 | 70 |
| 180–200 | 70T–80T | Medium-thin | Fine | Print-flash-print white, lighter deposit | up to 45 | 70–75 |
| 230 | 90T | Thin | Fine lines, small text | Halftones, water-based, soft-hand prints | up to 55 | 75–80 |
| 305 | 120T | Very thin | Very fine | CMYK process, simulated process | 55–65+ | 80 |
Want this on the darkroom wall? Download the one-page printable PDF chart — Letter size, free, no email required. Tape it next to the exposure unit; the halftone LPI and T-number columns are the two things everyone has to look up otherwise.
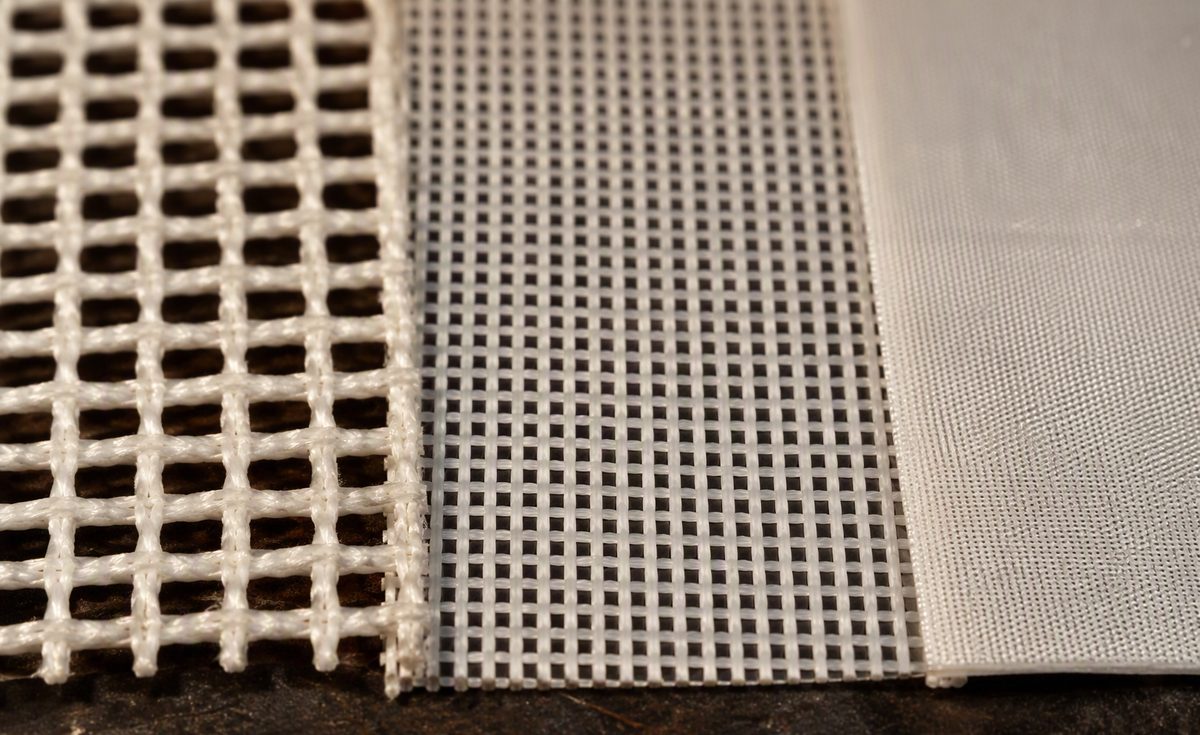
What Each Mesh Count Actually Prints Like
110 mesh: the coverage workhorse
110 lays down the thickest ink film of the three common counts. That’s exactly why it’s the standard answer for white ink on black shirts — opacity comes from deposit, and deposit comes from big openings.
The cost: fine lines close up, small text fills in, and the print feels like a layer of rubber on the shirt. Don’t try to hold halftone dots on 110 — the dots fall through openings that are bigger than the dots themselves.
156 mesh: the everyday default
156 is the balance point. Enough deposit for solid spot color on light and dark garments, enough resolution for reasonably detailed logos and multi-color work. If a shop could only keep one mesh count, this is the one.
For print-flash-print white, 156–180 is the sweet spot: bright enough after two hits, noticeably softer than a single heavy pass through 110.
230 mesh: detail and soft hand
230 is where you go for fine lines, small text, halftones, and water-based or discharge inks (thin inks flood through coarse mesh — the small openings meter them). The thin deposit also gives that soft, vintage “no-feel” print customers ask for.
The classic beginner mistake: printing white ink through 230 on a dark shirt and wondering why it looks gray. There’s simply not enough ink on the garment. Gray white = mesh too high or ink too thin, almost every time.
Only Buying 3 Screens? Buy These
Supplier blogs quietly assume you own the full range from 24 to 355. Real beginners have a budget. Here’s the order I’d buy in:
- First screen: 156. Run everything through it until a job forces you to change. You’ll be surprised how much work it covers.
- Second screen: 110. You’ll know it’s time the day you take an order for dark shirts and your white looks washed out no matter what you do.
- Third screen: 230. You’ll know it’s time when someone brings you art with fine lines or asks for a soft-hand print, or when you start experimenting with water-based ink.
Notice the pattern: don’t buy screens by specs, buy them when an order tells you to. Each screen above pays for itself with the job that demanded it.
Halftones: The 4–5x LPI Rule
Halftone art is measured in LPI (lines per inch) — how many rows of dots per inch. The mesh has to be fine enough that several mesh threads support each dot, or the dots deform and you get moiré (that wavy interference pattern).
Rule of thumb: mesh count ≈ 4–5× the halftone LPI.
| Halftone LPI | Minimum mesh |
|---|---|
| 22.5 LPI | 110 |
| 45 LPI | 200+ |
| 55 LPI | 230–305 |
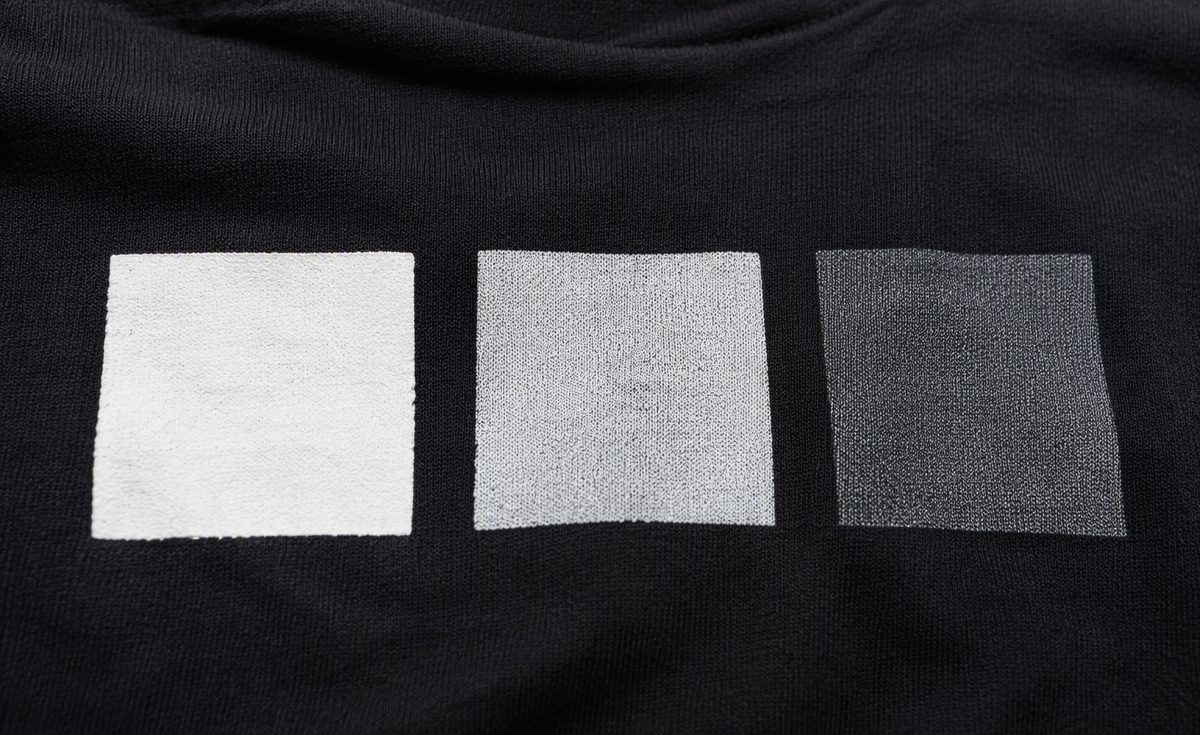
You can run it backwards too: a 156 mesh ÷ 5 safely holds about 31 LPI art. Most garment work lives between 35 and 55 LPI, which is why 230 is the halftone starting point and 305 is CMYK territory. Angle separation between colors matters as much as mesh — we use the classic 0° / 15° / 45° / 75° family. Our color separation guide walks through the full workflow, and the test strip below is from our own halftone engine — same dot pattern at three screen angles.

Yes, Mesh Count Changes Your Exposure Time
Coarse mesh holds a thicker emulsion layer; fine mesh holds less. Thicker stencil, longer exposure. So when you switch mesh counts, your old exposure time is no longer valid — a screen that was perfect at 110 can come out underexposed at 156 with the same timer setting.
Any mesh change means one thing: re-run a step-wedge test. Our exposure time guide shows the exact procedure, and the exposure calculator does the math once you have the test strip read.
The TPI vs. T Confusion (Read This Before Buying Online)
Here’s a trap that catches people every week: mesh is sold in two different unit systems.
- TPI (threads per inch) — the US convention: 110, 156, 230
- T (threads per centimeter) — the metric convention: 43T, 62T, 90T
Divide TPI by 2.54 and you get T. So 110 and 43T are the exact same mesh. Beginners see a listing marked “43T” and think it’s an ultra-coarse specialty screen — then the everyday 110 they thought they were avoiding shows up in the mail.
| You see | It’s actually |
|---|---|
| 110 TPI | 43T |
| 156 TPI | 62T |
| 230 TPI | 90T |
| 305 TPI | 120T |
Check which unit the listing uses before you order — and when in doubt, run it through our Mesh Count Converter.
One more spec-sheet trap: two screens can both say “156” and still print differently, because thread diameter differs. Thin-thread versions (you’ll see suffixes like S, or “thin thread” in the description) have larger openings at the same count — they release ink more easily and clog less with water-based inks, at the cost of being more delicate. Standard T-thread is tougher and handles thick plastisol better. Same number, different screen.
Squeegee Durometer: The Other Half of the Equation
Mesh count sets the ceiling on ink deposit. Your squeegee decides how much of that potential you actually squeeze out:
- 110 mesh (chasing a thick film) → pair with a soft 60–65 durometer blade that bends and pushes ink through the big openings.
- 156 mesh → the middle 70 durometer does most jobs.
- 230 mesh (chasing a thin, controlled film) → a harder 75–80 durometer blade skims cleanly and keeps the deposit thin.
High mesh + soft blade is a classic mismatch: the blade bends, digs in, and drives more ink through the fine mesh than you wanted — there goes your soft-hand print.
Not Sure Which One Your Job Needs?
Tables give you ranges. Your specific job — ink type, garment color, detail level, substrate — has one answer. Our Mesh Selector tool asks four questions and recommends a mesh count based on published mesh specs. Thirty seconds, no guessing.
Want a video walkthrough? This tutorial from Screen Print Direct covers the same ground with screens in hand:
FAQ
Where can I get a printable mesh count chart? Right here: download our free one-page PDF chart — mesh count in both TPI and metric T, ink deposit, typical jobs, halftone LPI limits, and squeegee pairing on a single Letter-size page. No signup.
What mesh count is best for white ink on dark shirts? 110–156 for the white underbase — you need a thick deposit for opacity. If you print-flash-print, 156–180 balances brightness and softness. White through 230 on a dark garment almost always looks gray.
What mesh count do I need for halftones? Start at 230; use 305 for CMYK process work. Keep the mesh at 4–5× your halftone LPI (55 LPI art needs at least 230–305 mesh) or you’ll get moiré and deformed dots.
What mesh count for glitter or puff ink? Glitter: 24–60, depending on flake size — the particles physically have to fit through the openings. Puff: 60–86 for the heavy deposit the expansion needs. Shimmer sits around 86–110.
Does mesh count affect how soft a print feels? Directly. Higher mesh = thinner ink film = softer hand. The softest plastisol prints come from 200–305 mesh with a harder squeegee. For maximum softness, combine high mesh with water-based or discharge ink.
Is 110 mesh good for beginners? It works, but it’s not the best first screen. 110 excels at white ink and bold coverage but can’t hold fine detail. A 156 covers far more of the jobs a beginner actually gets — start there, add a 110 when dark-garment orders demand it.
Mesh count isn’t mysterious — it’s a seesaw between ink deposit and detail. Start at 156, let your orders push you toward 110 or 230, and check the unit before you click “buy.”