Pinholes in Screen Printing: 9 Causes and a Fix for Each
Pinholes are gaps in the stencil, not holes in the mesh. The nine causes, a 60-second diagnosis, the fix for each — and the coating habits that stop them.
A pinhole is small enough to ignore on the screen and impossible to ignore on the shirt. One white speck in a solid black print, one ink dot through a halftone, and the job goes back on the press — or into the bin, if it was a 500-piece run.
Here is the part that saves time: a pinhole is almost never a mesh problem. The mesh is woven, tensioned and uniform; it does not randomly develop one hole in the middle of a solid area. What fails is the stencil — the emulsion film that decides where ink can and cannot pass. A pinhole is a spot where that film never formed, or formed too thin to survive the squeegee.
Once you accept that, the causes narrow from “everything” to nine specific points in the screen-making process. This guide covers all nine, how to tell them apart in about a minute, and what to actually do — including when the right answer is to redo the screen instead of patching it.
The 60-second answer
| What you see | Most likely cause | First thing to change |
|---|---|---|
| One or two holes, random spot, only on this screen | Bubble or dust trapped in the emulsion | Coat slower, degas the emulsion, filter it |
| Holes in the same place on every screen you make | Handling or storage — something is touching the stencil | Check how screens are stacked, dried and moved |
| Holes across every screen made that week | Emulsion batch, mixing, or exposure | Mix fresh diazo, re-run a step wedge |
| Holes appear only after a long print run | Dried ink flakes or stencil abrasion | Clean screens between runs, check reclaim |
| Holes only inside large solid areas | Dust on the film positive or glass | Wipe film and glass, inspect the positive on a light table |
| Holes that look like tiny craters with raised edges | Fisheyes, not pinholes — a contamination defect in the ink or coating | Read the fisheye section below, not this one |
That table resolves most cases. The rest of this guide is the reasoning behind it, plus the fix for each cause.
What a pinhole actually is
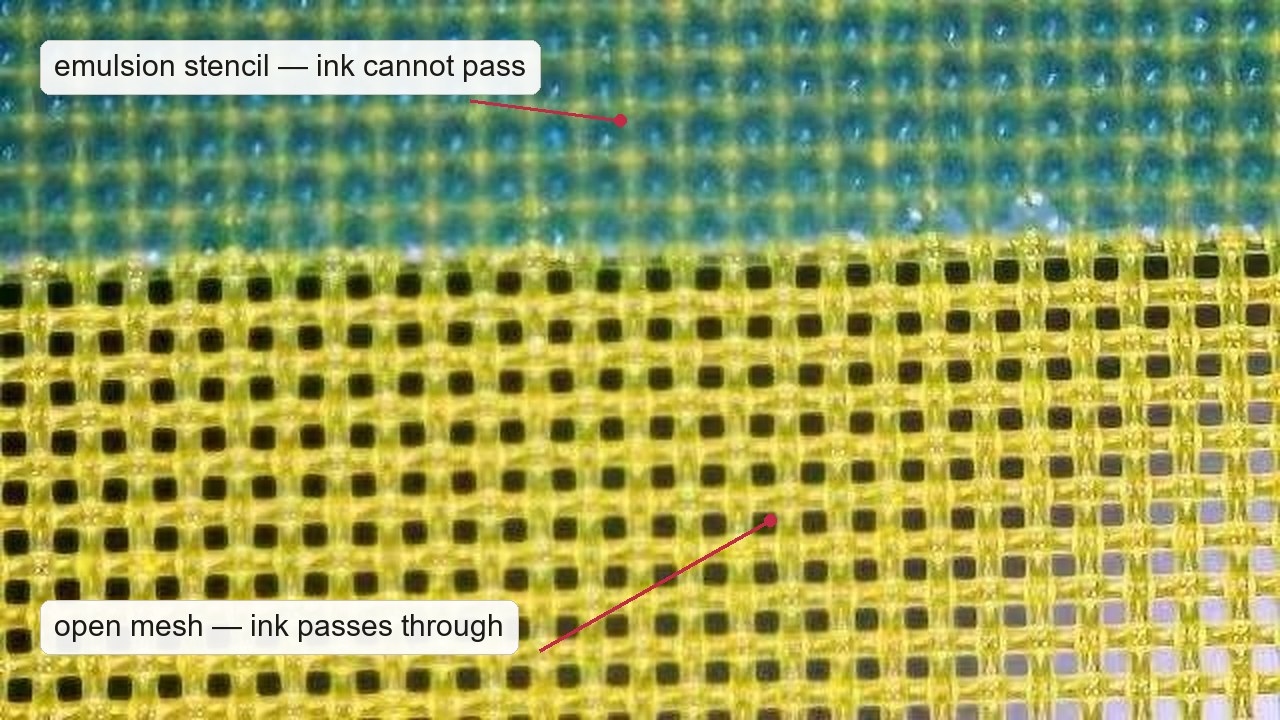
Emulsion is coated onto the mesh, dried, exposed through a film positive, and washed out. Where the film was opaque, the emulsion stays; where it was clear, the emulsion washes away and leaves an open area for ink. A pinhole is a place that should have stayed covered but didn’t — or a place where the emulsion layer is so thin that the squeegee’s pressure pushes ink through it.
Two details matter for diagnosis:
- Pinholes have clean, sharp edges in the print. They are the shape of the missing stencil, not the shape of a splash.
- A pinhole is repeatable. The same screen prints the same hole in the same place. If the defect moves between prints, you are looking at an ink or press problem, not a stencil problem.
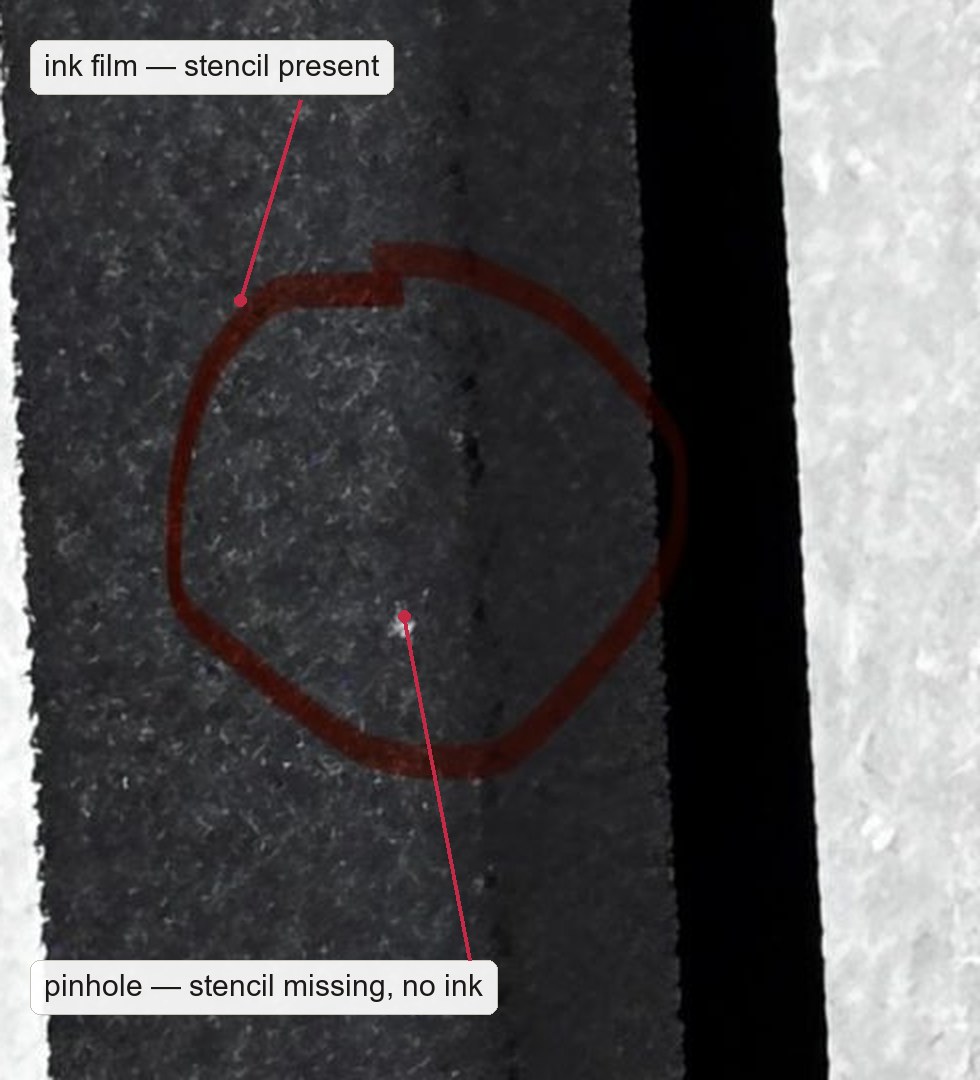
Pinhole, fisheye, or mesh mark?
These three defects get blamed on each other constantly, and they have completely different fixes. A pinhole is missing stencil. A fisheye is a crater where ink pulled away from a contaminated spot. A mesh mark is the woven texture showing through an ink film that was too thin to bridge it.
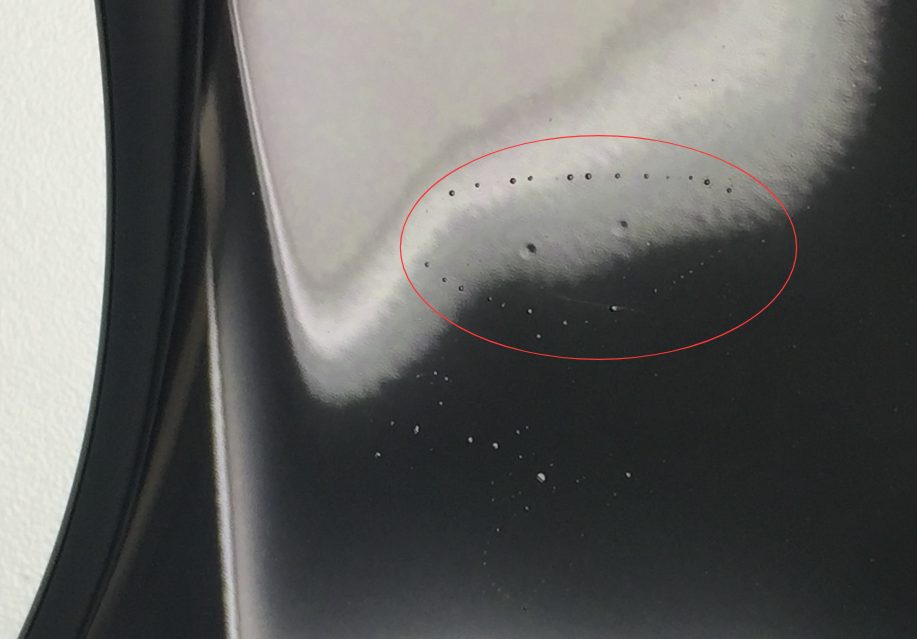
The quick test: look at the edge of the hole. Sharp, stencil-shaped edge with a clean circle of unprinted substrate underneath → pinhole. Raised rim, ragged crater, or a ring of thinner ink around it → fisheye. Faint woven pattern rather than a discrete hole → mesh mark.
The nine causes
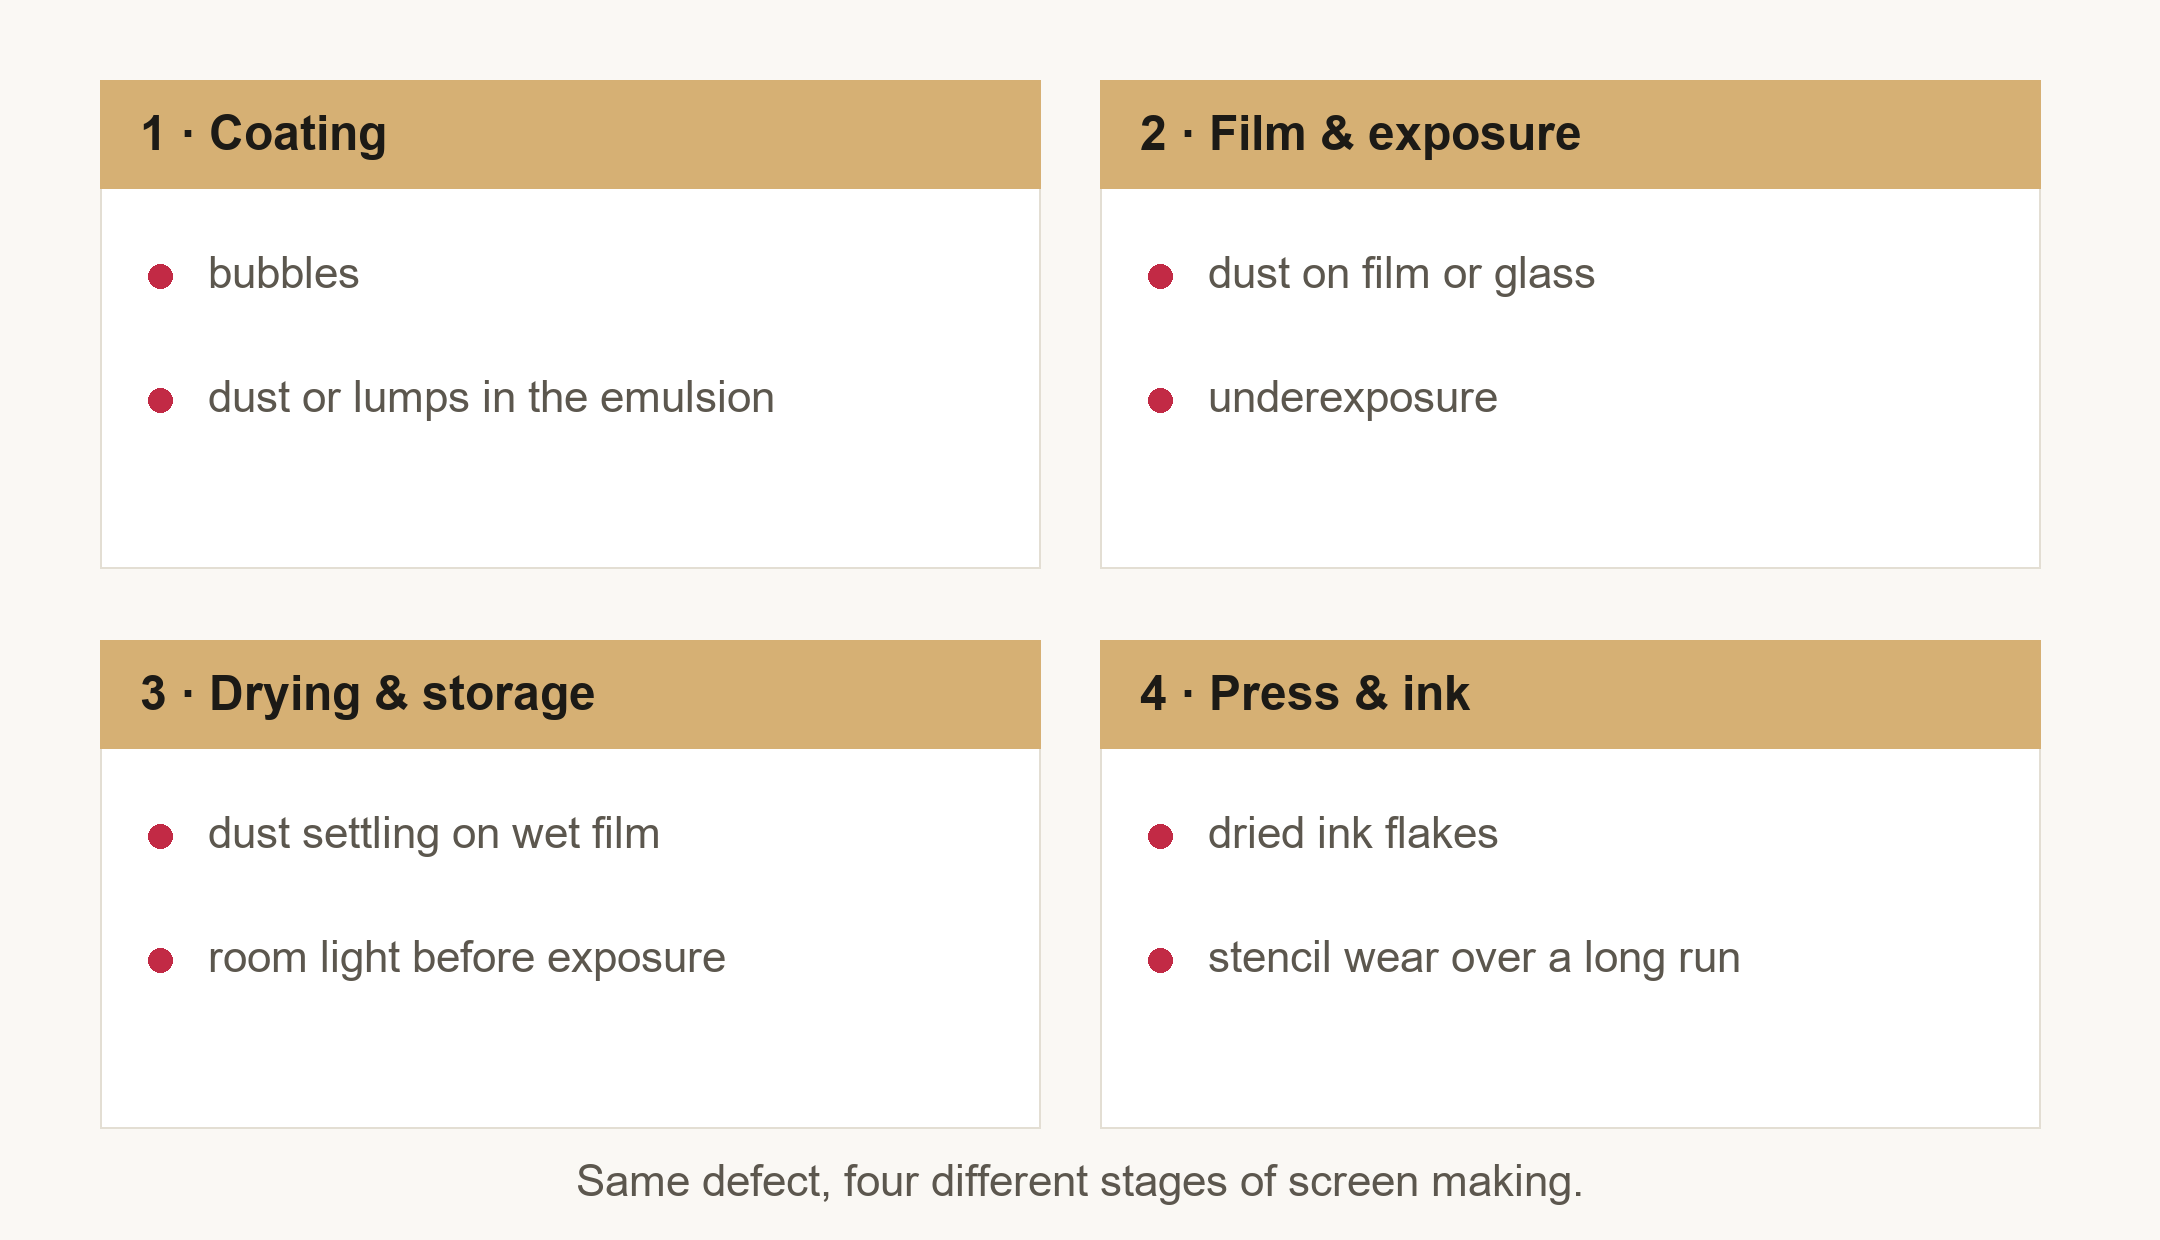
1. Bubbles in the emulsion
Emulsion is thixotropic and viscous; anything that whips air into it leaves bubbles that survive drying and burst only at the squeegee. Fast stirring, shaking a diazo bottle, pouring from height, or a pump that cavitates all do it.
Fix: stir slowly with a flat spatula for a full minute after mixing, let the emulsion sit 15–30 minutes to degas, and pour down the inside wall of the scoop coater. If you mix diazo, add it to the emulsion gently and never shake the bottle.
2. Undissolved diazo or old, chunky emulsion
Diazo powder that hasn’t fully dissolved, or emulsion past its shelf life with visible lumps, coats unevenly. Lumps sit proud of the stencil and wash out, leaving thin spots.
Fix: mix diazo with a small amount of water into a smooth paste before adding it, filter the emulsion through a 100-mesh filter bag when in doubt, and date every batch. Diazo-sensitized emulsion is typically good for 4–6 weeks refrigerated — brownish, chunky or sour-smelling emulsion is done.
3. Coating too thin — or too fast
A thin stencil has no reserve. The squeegee wears through it in a long run, and the edge of a solid area is where it fails first. Coating too fast also drags air into the emulsion and leaves the coat uneven side to side.
Fix: use a proper scoop coater, coat the print side first, then the squeegee side, and dry between passes for a multi-pass coat. The standard for garment work is 2 coats on the print side and 1–2 on the squeegee side; industrial work often needs more. Slow, steady passes beat fast ones every time — the stencil thickness you measure is what you print.
4. Dust on the film or glass
A speck of dust between the film positive and the glass blocks UV exactly where you didn’t want it to, and that spot washes open. The same happens with dust on the positive itself.
Fix: wipe the glass and the film with a lint-free cloth before every exposure, and inspect the positive against a light table. Keep the exposure unit covered when not in use; a glass surface in an open shop collects dust fast.
5. Transparent specks in the film positive
Inkjet films are not perfectly opaque. Pinholes in the printed black, or a film printed at too low a density, let UV through in pinpoints — enough to partially cure and leave a thin spot that fails on press.
Fix: print at the highest ink density your printer supports, double-print or stack two films for critical work, and hold the film up to a light: if you can see light through the black, it is not opaque enough. A densitometer is ideal but your eyes against a bright lamp catch most of it.
6. Underexposure
Underexposed emulsion is soft. It holds the image most of the time, then a small area washes out or abrades away — and because the whole stencil is soft, it happens in a different place each run.
Fix: run a step wedge test, read the actual exposure time, and add a safety factor of one step. This is the single highest-leverage habit in screen making; our exposure calculator walkthrough covers the step-wedge method, and the exposure time calculator does the arithmetic once you have the reading.
7. Dust settling on wet emulsion
Coated screens drying in an open shop collect dust in the wet film. The dust sits in the stencil, the emulsion dries around it, and the particle either blocks UV (creating a thin spot) or washes out with the emulsion.
Fix: dry screens face-down in a dust-free cabinet or a closed drying box, at under about 40% relative humidity, and never dry them under a bench where the shop is sanding or grinding.
8. Dried ink flakes in the screen
Plastisol skins over in the bucket and on the screen. A flake of cured plastisol pressed into the mesh during a run behaves like a tiny stencil — it blocks the opening, and when it releases, it takes emulsion with it.
Fix: stir ink before use, keep the screen flooded between prints, and clean the ink side of the screen at every color change. For long runs, a mid-run wipe-down with a clean rag and the right solvent (or water for water-based ink) prevents most of it.
9. Mesh or stencil abrasion over a long run
Beyond a few thousand impressions, the stencil edge abrades, especially with coarse mesh, high squeegee pressure and abrasive inks. The hole that appears after 3,000 prints on a screen that was perfect for 500 is wear, not a coating defect.
Fix: track impressions per screen, retire screens before they fail, and reduce squeegee pressure — pressure is not what pushes ink through; the correct angle and a sharp, straight blade do that. Our guide to how a squeegee really works explains the mechanics.
The 60-second diagnosis
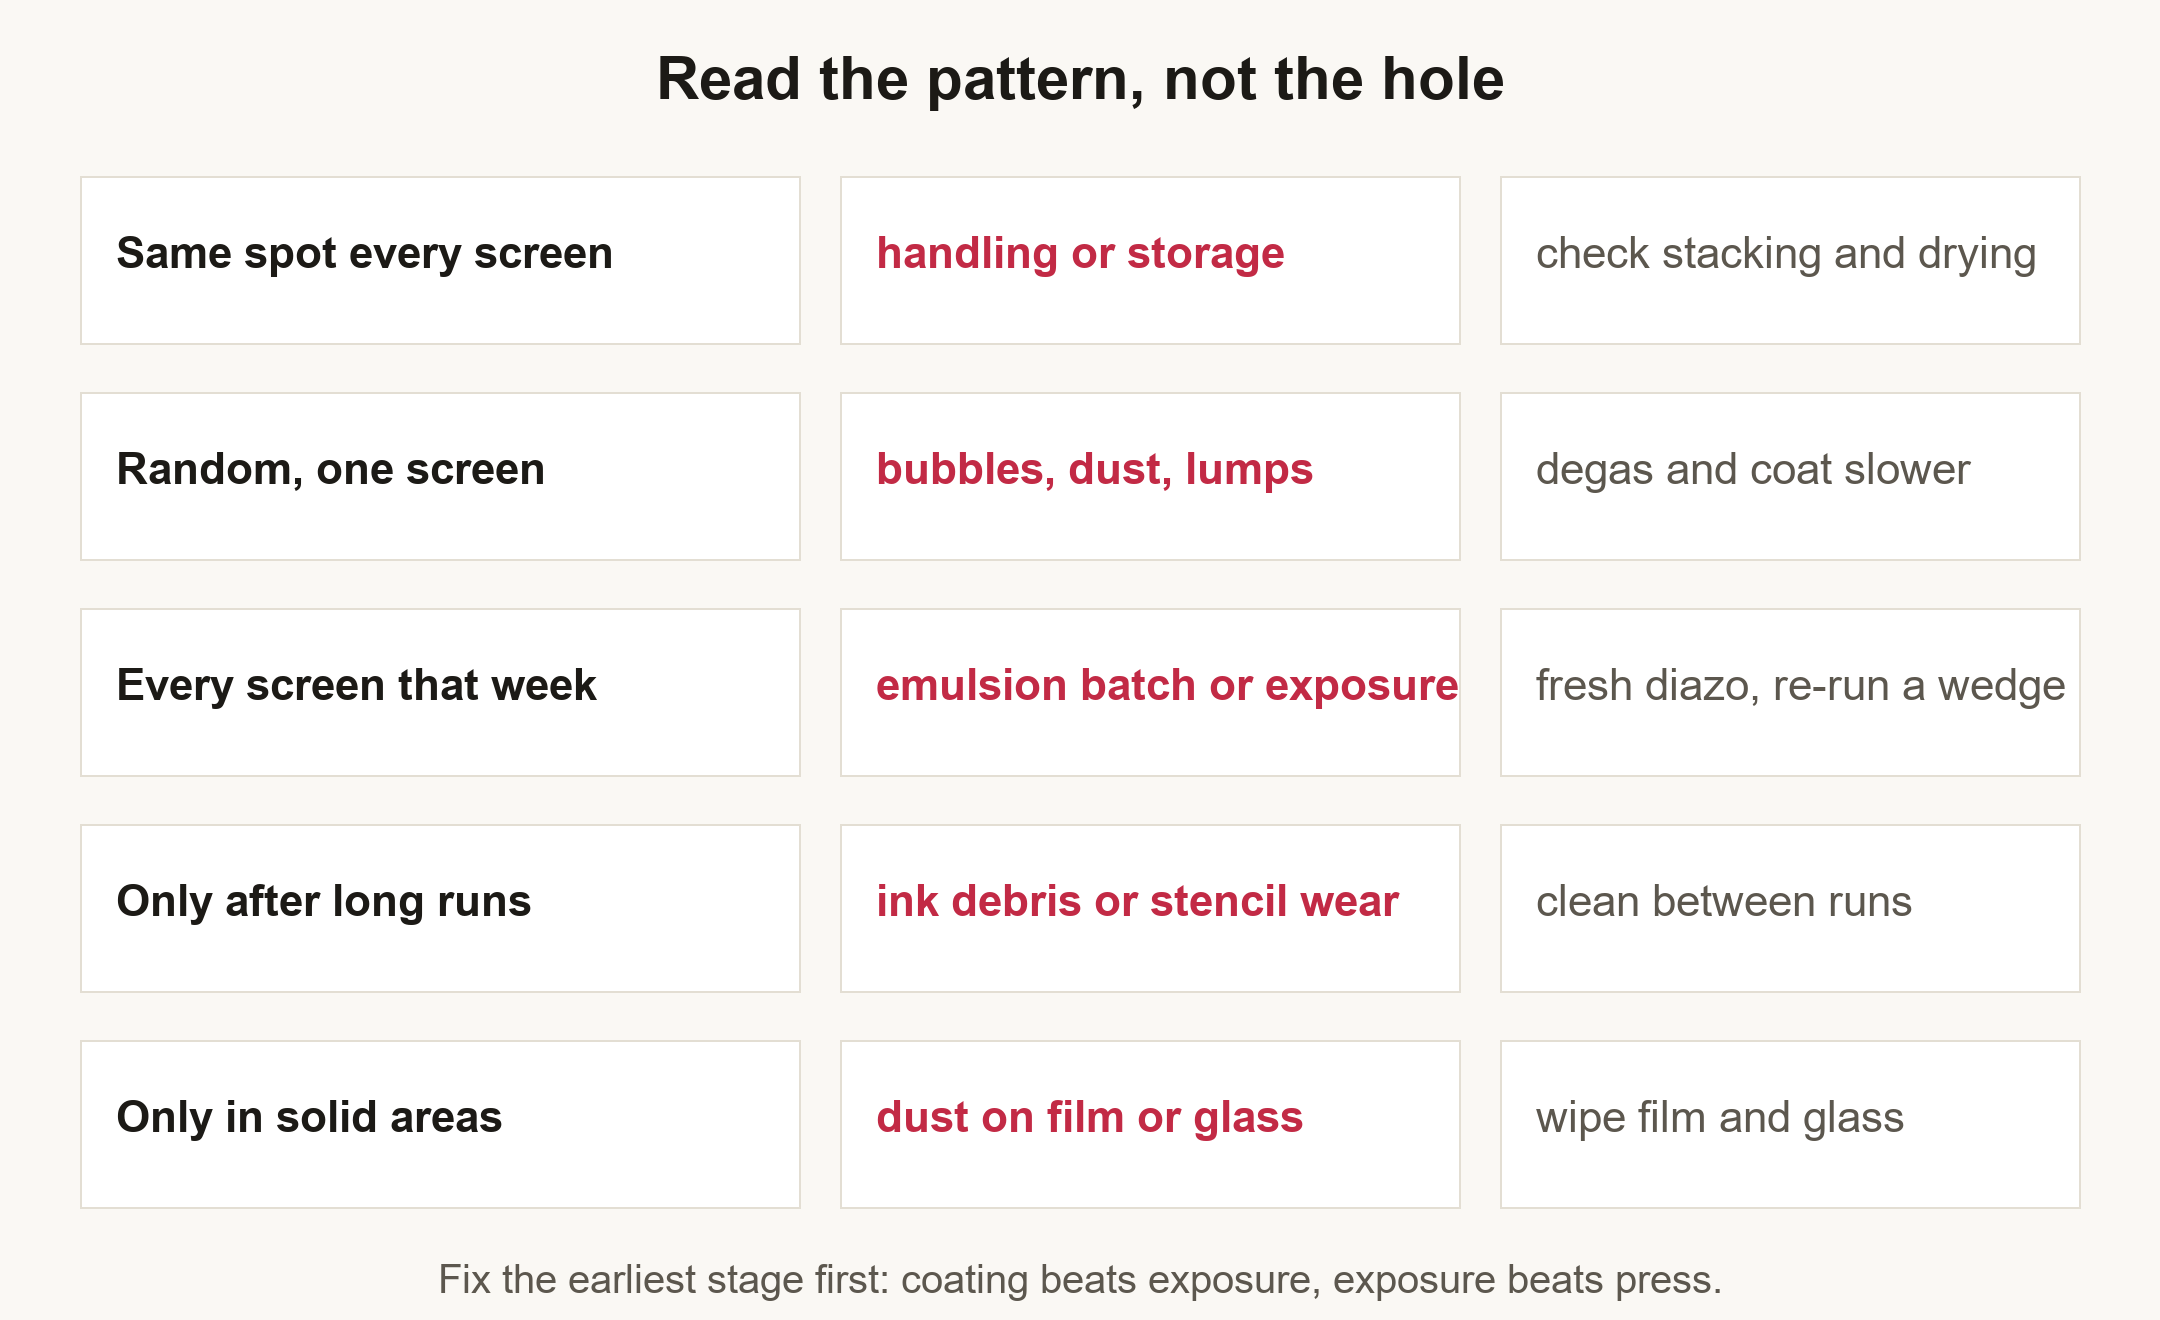
Work through the pattern questions in order, because the earliest stage in the process outranks everything after it:
- Does the pinhole appear in the same place on every screen? Then it is not the emulsion — something physical is touching the stencil. Look at storage, stacking, and how screens are carried.
- Is it scattered across one screen only? Coating. Bubbles, dust, lumps, thin spots.
- Did every screen made that week do it? The emulsion batch or the exposure setup. Mix fresh diazo, re-check exposure.
- Does it only appear after a long run? Ink debris or stencil wear.
- Is it only inside large solid areas? Film or glass dust, or a transparent speck in the positive.
If two patterns fit, fix the earlier stage first. A coating problem that you “fix” with a blockout pen comes back on the next screen.
How to fix a screen that already has pinholes
You have four options, and they are not equally good:
| Method | Best for | Durability | Notes |
|---|---|---|---|
| Blockout pen / screen filler | 1–5 small holes, non-critical area | Moderate | Dry fully before printing; check with a light behind the screen |
| Emulsion dab + spot cure | Larger or irregular holes | Good if cured properly | Dab from the print side, cure under the same lamp, then re-check |
| Tape on the squeegee side | Emergency, one-off jobs | Poor | Ink works under the edge; never for a production run |
| Redo the screen | More than a few holes, or holes in the image area | Best | The cheapest option once you count the time spent patching and the risk of a failed print |
The rule I use: if the pinhole is inside the printed image and the order is more than a handful of pieces, redo the screen. Patching inside an image area is a temporary fix that fails at the worst possible moment — usually mid-run, on the last dozen shirts.
Before you patch, verify there is no light coming through: hold the screen up to a bright light or put it on a light table. A pinhole you cannot see will still print.
Prevention: the five habits that remove most pinholes
- Filter and degas the emulsion. 100-mesh filter bag, 15–30 minutes of rest after mixing, slow stirring. This alone removes the most common cause.
- Coat slowly, dry face-down, in a controlled space. Two print-side passes, dry in a dust-free cabinet under 40% RH.
- Test exposure, don’t guess it. Step wedge, written-down time, one step of safety margin.
- Clean the film and glass every time. Lint-free cloth, light-table check on the positive.
- Inspect the screen before it goes on press. A light behind the screen takes ten seconds and catches almost every pinhole before it becomes a print defect.
None of these are exotic. They are the difference between a shop that redoes a screen a week and one that redoes three a day.
Watch it done: two short videos
FAQ
Can you fix pinholes without redoing the screen? Yes, for a few small holes outside the image area: blockout pen or filler, fully dried, verified against a light. Inside the image area on a production run, redo the screen — a patch there fails mid-run.
Why do pinholes appear only after washing the screen? Because washing removes the thin, underexposed emulsion that was hiding the defect. If holes appear after reclaim, the stencil was already thin at that spot — check exposure and coating thickness.
Are pinholes worse with water-based inks? They are more visible, because water-based ink wicks into fabric and a tiny hole shows as a distinct dot, and because water-based stencils need a harder, fully cured emulsion. The causes are the same; the tolerance is tighter.
Does mesh count affect pinholes? Indirectly. Coarser mesh holds a thicker stencil and hides small gaps; fine mesh (230 and up) shows every thin spot and needs better coating discipline. See the mesh count chart for how mesh changes stencil thickness.
Is it a pinhole or a fisheye if the spot is in a solid area? Look at the edge: sharp stencil-shaped edge = pinhole; raised rim or crater = fisheye. Fisheyes come from ink or substrate contamination and are covered in the full defect atlas.
Pinholes are a process problem, not a mystery. Read the pattern, fix the earliest stage it points to, and inspect screens before they reach the press. Do those three things and the defect drops to a rare annoyance instead of a weekly crisis.
For the wider map of print defects — bleeding, sawtoothing, ghosting, misregistration — start with the defect field guide. For the exposure side that causes half of these holes, see why your screen won’t wash out.